

Are Professional Golf Simulator Installation Services Worth It?
Last Updated: October 30, 2026
Quick Summary
Professional golf simulator installation services cover the full build: site assessment, room design, equipment selection, enclosure framing, projector alignment, and post-install calibration. A simulator that gets used daily usually comes down to planning, not budget. Professional installation typically takes 1-3 days on site for a standard bay.
- 9 feet is the practical ceiling height floor for a driver swing.
- Enclosure and screen costs typically range from $2,500 to $12,000.
- Skipping top and side netting is the most common enclosure mistake.
- DIY breaks down most often on framing, projector alignment, and launch monitor calibration.
- Plan the build by measuring the room before choosing the enclosure and launch monitor.
Table of Contents
- What Professional Golf Simulator Installation Services Actually Include
- Site Assessment and Custom Room Design
- Golf Simulator Room Dimensions: The Measurements That Decide Everything
- Golf Simulator Installation Cost: What Each Stage Adds
- Golf Simulator Enclosure Installation: Bay Sizing, Framing, and Impact Surfaces
- Golf Simulator Projector Setup: Mounting, Alignment, and Image Fitment
- DIY Versus Professional Installation: Where Each One Breaks Down
- Calibration, Testing, and Troubleshooting After the Crew Leaves
- Choosing an Installer and Planning Your Simulator Build
- Frequently Asked Questions
What Professional Golf Simulator Installation Services Actually Include
Professional golf simulator installation services cover the full build: site assessment, room design, equipment selection, enclosure framing, projector alignment, and post-install calibration. A simulator that gets used daily usually comes down to planning, not budget.
A simulator is not a box you drop in a corner. It is a system, and every part affects the next. Get the room wrong and the best launch monitor on the market still gives you a crooked picture and a swing you cannot complete.
Below, we break down what each stage of a professional golf simulator installation involves, what it costs, and where DIY builds tend to fail.
Site Assessment and Custom Room Design
A proper site assessment answers three questions before anyone orders hardware: is the room big enough, is the ceiling high enough, and where does the ball actually need to travel. A thorough site assessment measures ceiling height, room width, depth, and the position of beams, ductwork, and light fixtures.
Custom design follows the measurements. The goal is a golf room where a full swing clears every surface and the screen sits at the right distance for the projector's throw. A common mistake is designing around the screen first and the swing second. That order produces simulators nobody can hit a driver in.
Golf Simulator Room Dimensions: The Measurements That Decide Everything
Depth needs to account for the golfer, the launch monitor's tracking zone, and the screen.
Here is what matters most:
- Ceiling height: 9 feet is the practical floor for a driver swing. Lower ceilings push you toward a compact enclosure and a shorter backswing.
- Width: 12 feet lets right- and left-handed players share the bay. Narrower rooms favor one-handed setups.
- Depth: 10 to 15 feet from screen to back wall keeps the projector throw and tracking zone clean.
- Swing clearance: Measure from the ball position outward, not from the wall.
If your space is tight, a low basement or a bonus room with a soffit, our guide to a golf simulator for low ceiling basement walks through the ceiling and layout constraints in detail.
Golf Simulator Installation Cost: What Each Stage Adds
Golf simulator installation cost splits into hardware, construction, and labor. Most buyers fixate on the launch monitor, but the room and the install labor are where budgets quietly drift.
| Stage | What It Covers | Primary Cost Driver | Typical Range (USD) |
|---|---|---|---|
| Site assessment and design | Measurements, layout, equipment plan | Room complexity, number of revisions | $0-$1,500 (often credited toward the build) |
| Enclosure and screen | Bay frame, impact screen, side/top netting | Bay width, screen grade, netting coverage | $2,500-$12,000 |
| Projector and mounting | Projector, ceiling mount, cabling | Throw distance, brightness, mount adjustability | $1,200-$6,000 |
| Hitting surface | Stance mat, turf, subfloor | Footprint, mat thickness, turf grade | $800-$4,000 |
| Launch monitor and computer | Tracking hardware, software license, PC | Accuracy tier, subscription vs. perpetual license | $3,000-$25,000+ |
| Labor and calibration | Install crew, electrical, testing, tuning | DIY vs. professional, electrical runs, ceiling work | $1,500-$8,000 |
Itemized Budget Ranges and Where Costs Hide
Three line items blow up budgets more than any other: ceiling reinforcement, dedicated electrical runs, and screen replacement after a mis-hit.
- Ceiling reinforcement. A projector mount and enclosure frame both load the ceiling. If joists are not where you need them, expect framing and blocking work that no equipment list mentions.
- Electrical. A projector, gaming PC, launch monitor, and lighting usually want more than one circuit. Running dedicated circuits through finished drywall is a construction job, not a plug-in.
- Screen and netting. Skipping top and side netting to save a few hundred dollars is the most expensive shortcut in the category. One sky-high wedge into drywall or a light fixture costs more than the netting ever would.
- Software licensing. Some launch monitors bundle a subscription; others charge annually for course play. Over five years, that difference can exceed the hardware price gap between two monitors.
Golf Simulator Enclosure Installation: Bay Sizing, Framing, and Impact Surfaces
Enclosure installation starts with bay sizing against the room, then framing, then the impact screen. The frame carries the screen and netting, so it has to be anchored and square. A screen that hangs unevenly distorts the projected image and wears faster at the seams.
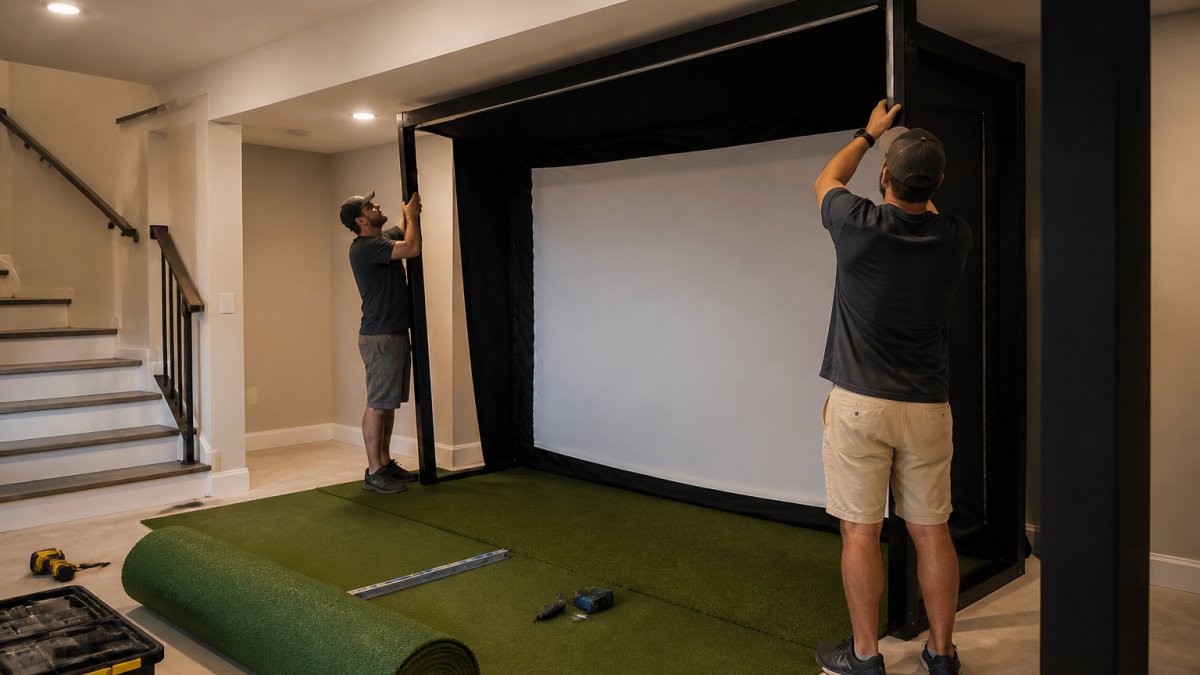
Bay depth matters more than most buyers expect. A deeper bay contains mishits better and gives a more complete full-swing feel. The MICRO BAY for small rooms is a compact enclosure designed for smaller rooms, suited to home offices, garages, and spare bedrooms where floor space is tight.

Watch out: skipping the top and side netting to save money is the single most common enclosure mistake. A single sky-high wedge finds the ceiling, the light fixture, or the drywall behind the frame.
Golf Simulator Projector Setup: Mounting, Alignment, and Image Fitment
Projector setup is where most DIY builds stall. The projector must sit at the right distance for its throw ratio, centered on the screen, and squared to avoid keystone distortion. A ceiling mount that cannot slide front to back turns a 10-minute adjustment into an afternoon.
Two pieces make this easier. An adjustable sliding projector mount allows precise front-to-back positioning for clean image fitment. An offset capable laser projector gives flexible alignment options.


Common mistakes in this stage:
- Mounting before confirming throw distance
- Ignoring ambient light, then wondering why the image looks washed out
- Running the HDMI cable after the ceiling is closed up
DIY Versus Professional Installation: Where Each One Breaks Down
DIY is a legitimate path when the room is simple: square walls, a 9-foot-plus ceiling, existing power, and an owner who enjoys the work. It breaks down in predictable places. Use the framework below to decide which side of the line your project sits on.
| Factor | DIY | Professional Installation |
|---|---|---|
| Complexity | Manageable with a square room and standard bay | Handles odd shapes, soffits, low ceilings, multi-circuit power |
| Time | Weekends over several weeks, plus research | Typically 1-3 days on site for a standard bay |
| Calibration | Owner learns alignment and software setup | Crew aligns launch monitor, projector, and software before leaving |
| Warranty | Manufacturer warranty on parts; install errors are yours | Installer typically stands behind labor and calibration |
| Total cost | Lower cash outlay, higher risk of rework | Higher upfront, fewer surprise costs |
| Best fit | Garage or bonus room with clean geometry | Basement, finished room, or any space needing construction |
The Three Places DIY Usually Fails
- Framing the enclosure square. A frame that is out of square by even a small amount shows up as a distorted image and uneven screen wear at the seams.
- Projector alignment without an adjustable mount. Throw distance and centering have to be right before the ceiling is closed up. A fixed mount turns a ten-minute adjustment into an afternoon.
- Launch monitor calibration. Tracking accuracy depends on aligning the monitor to the hitting area and the screen. Without a repeatable calibration routine, readings drift and the owner blames the hardware.
When Professional Installation Pays for Itself
Professional installation can address those three steps, plus electrical planning and post-install testing.
For a basement with low ceilings or an odd shape, professional guidance prevents an expensive purchase that will not fit. If you are weighing the two paths, start with a site assessment, it is the cheapest way to learn which side of the line your room falls on.
Calibration, Testing, and Troubleshooting After the Crew Leaves
Calibration covers launch monitor alignment to the hitting area, projector focus and geometry, and software setup for the tracking technology.
Test the system before the crew leaves:
- Hit a full swing with every club, including the driver
- Check that the ball flight on screen matches the shot feel
- Confirm the projector image fills the screen without distortion
- Run the software through a full round to catch lag or crashes
Troubleshooting after installation usually traces to one of three causes: a launch monitor knocked out of alignment, a projector that drifted, or a computer that cannot keep up with the simulation software. A simulator-optimized computer is designed to handle demanding simulator software.
Choosing an Installer and Planning Your Simulator Build
When comparing installers, ask how they handle ceiling height, projector throw, and screen replacement, and whether they will tell you when a room will not work.
Plan the build in this order: measure the room, choose the enclosure and screen, select the launch monitor and software, then set the projector and mount. That sequence keeps every decision tied to the space you actually have.
Game Supply Co curates premium golf simulator equipment from trusted manufacturers, from enclosures and launch monitors to hitting surfaces and projector mounts, with a focus on designing the entire room.
Frequently Asked Questions
What does professional golf simulator installation include?
Ask any installer what is included, including site assessment, room design, equipment selection, enclosure and screen assembly, projector alignment, and calibration, and what support follows the install.
What room dimensions do you need for a golf simulator?
Measure your lowest ceiling point and any ductwork before ordering anything, since swing clearance and ceiling height are the limits that are hardest to fix later.
Can a golf simulator be installed in a garage?
Yes, garages are one of the most common simulator spaces because the ceiling height and depth are usually already there. The trade-offs are temperature swings, overhead door tracks, and lighting, so check door clearance and whether the bay can sit far enough from the tracks.
Do you need a professional to install a golf simulator?
You can assemble an enclosure yourself, but the parts that decide performance, projector alignment, launch monitor positioning, and hitting area placement, are where DIY setups usually fall short. Professional golf simulator installation services can handle those steps. If you are spending several thousand dollars on equipment, paying for the setup stage protects that investment.
Building a simulator that fits your room, your swing, and your budget takes careful planning. Game Supply Co offers customizable golf simulator builds, simulator-grade equipment, and the guidance to design a room worth showing off. Get started with Game Supply Co and build a game room that defines the space.
