

How to Level a Floor for a Pool Table: 7 Steps
Last Updated: November 1, 2026
Quick Summary
The best way to level a floor for a pool table is to check it first with a level measured in three directions, then either fix the floor if it slopes more than about 1/4 inch or flexes, or use shims under the low legs for small, solid slopes. Always adjust one leg at a time and recheck.
- Measure along the length, width and both diagonals, and note which side reads low.
- If the floor slopes more than about 1/4 inch across the footprint, correct the floor first.
- Use plastic shims for basements and slabs, since they resist moisture and compression.
- Never stack more than two or three shims at a single leg.
- Recheck the level after a few days, because new shims and floors can settle.
Table of Contents
- Why Floor Level Matters for Your Pool Table
- How to Check if a Floor Is Level Before You Start
- Level the Floor Itself or Compensate at the Table?
- Choosing the Best Tool to Level a Pool Table
- Using Pool Table Shims for Uneven Floors
- Step-by-Step: Leveling Your Table Without Damaging the Felt
- Pick Your Setup and Book a Level Check for Your Room
- Frequently Asked Questions
Why Floor Level Matters for Your Pool Table
A pool table that sits off level plays off level. Balls drift toward the low side, the cushions give uneven bounces, and the slate can even stress over time. Learning how to level a floor and getting the table right is the foundation for every shot you take.
A room that looks flat can still slope, so the floor is usually the first thing to check, not the table itself.
Many homeowners assume the table is the problem. Often the floor is. A basement slab can dip by a noticeable amount across a 4-by-8-foot footprint, and a wood floor can flex under weight. Knowing which one you have decides how you fix it.
- Balls roll toward the low corner, even on a good stroke
- Cushions rebound unevenly, which changes angle and speed
- Slate can crack or warp if it carries stress for years
How to Check if a Floor Is Level Before You Start
Checking the floor is the first step, and a careful pass takes about 20 to 30 minutes. The goal is not just to learn whether the floor is level, but whether it is flat, stable, and strong enough to hold a pool table.
Level versus flat. A floor can be perfectly level and still be wavy, or perfectly flat and still slope. A pool table needs both: no tilt across its footprint and no dip or crown under the legs.
Load matters. Slate pool tables are heavy, and most of that weight sits on four legs. That point load is what exposes a soft subfloor. Check the floor where the legs will actually sit, not just the center of the room.
Measuring Along Length, Width and Diagonals
Measure in three directions. Run the level along the length of the room, then across the width, then diagonally between opposite corners. The diagonal check catches twists that straight lines miss.
Write down each reading and note which side is low and by how much. A simple map helps: sketch the room, mark the leg positions, and write the reading at each spot. If you want a number rather than a bubble, set a straightedge on the floor and measure the gap under it with a tape or feeler gauge. A slope of 1/8 inch across 4 feet is minor; 1/2 inch across the same span is a floor problem, not a shim problem.
Diagnosing a Moving or Flexible Floor
Walk across the spot where the table will sit. If the floor bends or bounces, it will not hold a level setup.
Common signs of a moving floor include creaks, a springy feel, and readings that change when you shift your weight. A more reliable test: have someone stand where a leg will go while you watch the level.
Find the joists. In a wood-framed floor, the table should span multiple joists, ideally with legs sitting over or near joist lines rather than between them.
Check for moisture and movement over time. Basement slabs wick moisture, and wood floors move with seasonal humidity. A floor that reads level in dry winter air can crown in summer.
If the floor is soft, bouncy, or slopes more than about 1/4 inch across the table footprint, stop and address the floor before the table arrives. The next section explains how to decide between fixing the floor and compensating at the table.
Level the Floor Itself or Compensate at the Table?
Here is the real choice. You can change the floor, or you can adjust the table to match the floor. Each has a place.
Compensating at the table works when the slope is small and the floor is solid. Leveling the floor works when the slope is large or the floor moves. Many homeowners find that a small slope is easier to handle with the table legs, while a large dip needs a floor fix.
- Choose table adjustment for slopes you can correct with a few shims
- Choose floor work for dips, soft spots, or any flexing
- Choose both when the room is large and the slope is uneven
Choosing the Best Tool to Level a Pool Table
The right tool makes the job faster and more accurate. A bubble level is the basic tool, but a longer level gives better readings across a full table.
For most homes, a 4-foot level and a smaller torpedo level for the rails work well together. Pair them with a set of leveling feet or adjustable legs if your table has them.
Our PANTHER ZD-12X POOL TABLE is listed at $8,085.00. Other pool tables in our lineup include the TOP CAT 7' HOME POOL TABLE at $7,395.00 and the PANTHER LED 88 POOL TABLE at $5,995.00. You can see the full build and dimensions of this table before deciding what fits your room.

Learn more about the PANTHER ZD-12X POOL TABLE.
Using Pool Table Shims for Uneven Floors
Shims fill the gap between a leg and the floor. They are the most common way to correct a small slope without moving the table, and for slopes under roughly 1/4 inch across the footprint they are usually the right first move. The choice of material matters more than most guides admit, because a shim that compresses, crumbles, or absorbs moisture will let the table drift out of level within weeks.
Choosing the Right Leveling Material
- Plastic shims. Durable, moisture-resistant, and available in graduated thicknesses that stack predictably. They resist compression better than wood and are the safest choice for basements and slabs. The trade-off is that hard plastic can be slippery on smooth concrete, so pair them with a thin pad or check that the leg foot has grip.
- Hardwood shims. Traditional and easy to trim, but wood compresses under a heavy slate table and moves with humidity. Use them for thicker gaps where you need a wedge, and inspect them after a few months for crushing.
- Leveling pads. Rubber or composite pads spread the load and damp vibration, which helps on wood floors. They are less precise for fine adjustment, so use them as a base layer under shims rather than as the only correction.
- Adjustable feet and leg levelers. If your table has threaded leveling feet, use them first, they give continuous adjustment without stacking anything. Many tables ship with them; check the leg before you buy shims.
Placing and Adjusting Shims
Place the shim under the low leg, not the high one, and add thin layers slowly. Work one leg at a time and recheck the level after each change. Do not add a large shim all at once; small steps keep the table from rocking and help you stop at the right point.
Keep the shim fully under the leg foot so the load is centered. A shim that sticks out past the foot can tip or crush at the edge. On a hard floor, a light tap with a mallet seats the shim without splitting it.
Keeping the Table Stable While You Adjust
A slate table is heavy and top-loaded, so it can shift while you work underneath it. Have a second person steady the table, or lower the adjustable feet on the high side first so the table rests on more legs rather than fewer.
After adjustment, tighten any leg hardware and roll a ball from end to end and corner to corner. A ball that curves toward the same side every time means the level is still off, not that the felt is bad. Recheck after a few days; new shims and pads settle, and a quick second pass is normal.
Shims are the most common way to correct a small slope, and the material you pick decides how well the fix holds.
| Material | Best for | Key difference |
|---|---|---|
| Plastic shims | Basements and slabs | Moisture-resistant, stack predictably, can be slippery |
| Hardwood shims | Thicker gaps | Easy to trim, compress and move with humidity |
| Leveling pads | Wood floors | Spread load and damp vibration, less precise |
| Adjustable feet | Tables with threaded feet | Continuous adjustment, no stacking needed |
Step-by-Step: Leveling Your Table Without Damaging the Felt
Start by clearing the table and removing the balls, rack, and cue rests. Lift the table gently. Do not drag it across the floor, because that can shift the legs and stress the frame.
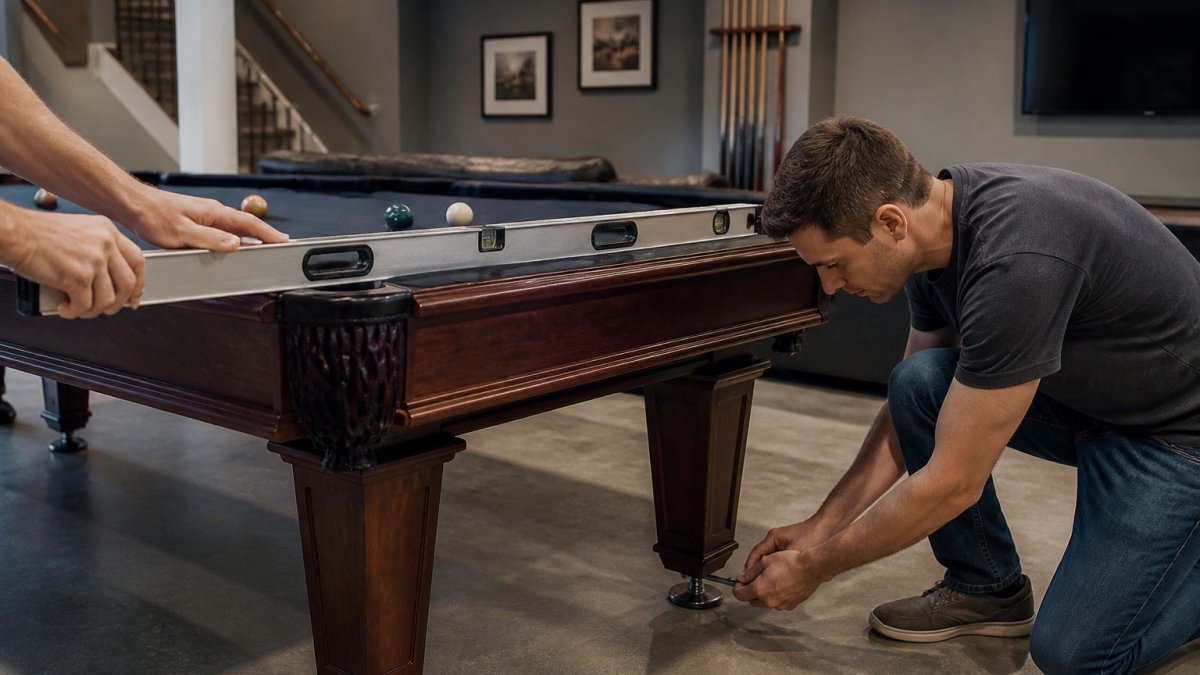
- Place the level on the table. Set it across the slate in both directions.
- Find the low side. Note which corner or edge reads low.
- Adjust the low leg. Turn the leg or add a shim under it.
- Recheck the length and width. Confirm each direction reads level.
- Check diagonally. Measure between opposite pockets.
- Make small changes. Adjust a little, then check again.
- Tighten and test. Lock the legs and roll a ball from end to end.
Keep the felt clean and protected while you work. A small dust cover or a clean sheet on the table helps. Never press hard on the slate when you test the level.
Check the table again after a few days. Floors can settle, and a slight change can throw off the level.
Pick Your Setup and Book a Level Check for Your Room
A level table starts with the right floor and the right table. Once you know your slope, you can choose a table that fits your space and your plans.
The PANTHER POOL TABLE is listed at $5,795.00.

Measure your room, note your floor readings, and decide whether the fix belongs to the floor or the table. With those steps done, your pool table will play true for years.
Frequently Asked Questions
What can I use to level a pool table?
Most owners use adjustable leveling feet, plastic or hardwood shims, and a bubble level. Adjustable feet handle small corrections, while shims fill larger gaps under legs. Check the table with a level placed on the rails and cloth, and adjust until the bubble centers in both directions. Recheck after every change, since tightening one leg often shifts another.
Should I level the floor or the pool table?
Level the table whenever the floor is solid and only slightly out of plane, because the table's leveling feet and shims can correct small variations. If the floor itself slopes, sags or moves, correct the floor first. Compensating at the table alone can stress the frame and leave the playing surface unstable over time.
Can I use shims under a pool table on an uneven floor?
Yes. Hardwood or plastic shims placed under leg bases or leveling feet are a common fix for uneven floors. Use the thinnest shim that closes the gap, keep the stack stable, and avoid shims that compress under weight. Check the table after the first weeks of use, because shims can settle and require adjustment.
How can I tell if a floor is too uneven for a pool table?
If the table cannot be brought within a small tolerance using its leveling feet, the floor likely needs work. Signs include a level reading that changes as you move around the room, a table that wobbles when pressure is applied, or a slope across the room that exceeds what the feet can correct. In those cases, consider a floor repair or a professional assessment before installing the table.
